Model a system
This guide shows you how to model a system: the elements, the relationships between them, the diagrams that show them and the messages that they exchange. You need the editor role in the workspace.
The model is the source of truth. The canvas shows the model. A change on the canvas writes to the model.
Create a project
Section titled “Create a project”- Open
http://localhost:8080and sign in. - Below Workspaces, find the workspace. If there is none, select Create Workspace, enter a Workspace name and select Create.
- Select the workspace, then select + New Project.
- In Create Project, enter a Project name and select Create. Vellum opens the project.
Vellum creates a diagram named Default the first time you open a project that has no diagram.
Know the element kinds
Section titled “Know the element kinds”A model has five kinds of element. Each kind has one permitted parent.
| Kind | Parent | Shortcut |
|---|---|---|
| Actor | None. An actor is at the top level. | Shift+P |
| System | None. A system is at the top level. | Shift+S |
| App | A system. | Shift+A |
| Store | A system. | Shift+D |
| Component | An app. | Shift+X |
The server refuses an element with the wrong parent. The answer is 400 with a message such as App requires a parent of kind System.
Add an element
Section titled “Add an element”The canvas shows one level at a time. The top level is Context. A new element gets the level that you look at as its parent. Vellum offers only the kinds that the level permits.
Use one of these methods.
- Select Element catalog in the left toolbar. Below Elements, select a kind.
- Press the shortcut of the kind.
- Double-click an empty part of the canvas. Select a kind.
- Right-click an empty part of the canvas. Select Add Actor or Add System (at the top level), or the kinds that the level permits.
- Press
N. In Add Element, select the kind, enter a Name and select Add. - Open the command palette with
Ctrl+KorCmd+K. Select Add element. - Drag from the handle of an element to an empty part of the canvas. Select a kind. Vellum adds the element and a relationship from the first element to it.
Except for the Add Element dialog, a new element has the name New <kind>. Rename it in the detail panel.
Go into a system or an app
Section titled “Go into a system or an app”- Double-click a system or an app. As an alternative, right-click it and select Drill into.
- Add the elements of that level. A frame with the name of the system or the app holds them.
- Select Context or a name in the breadcrumb to go up.
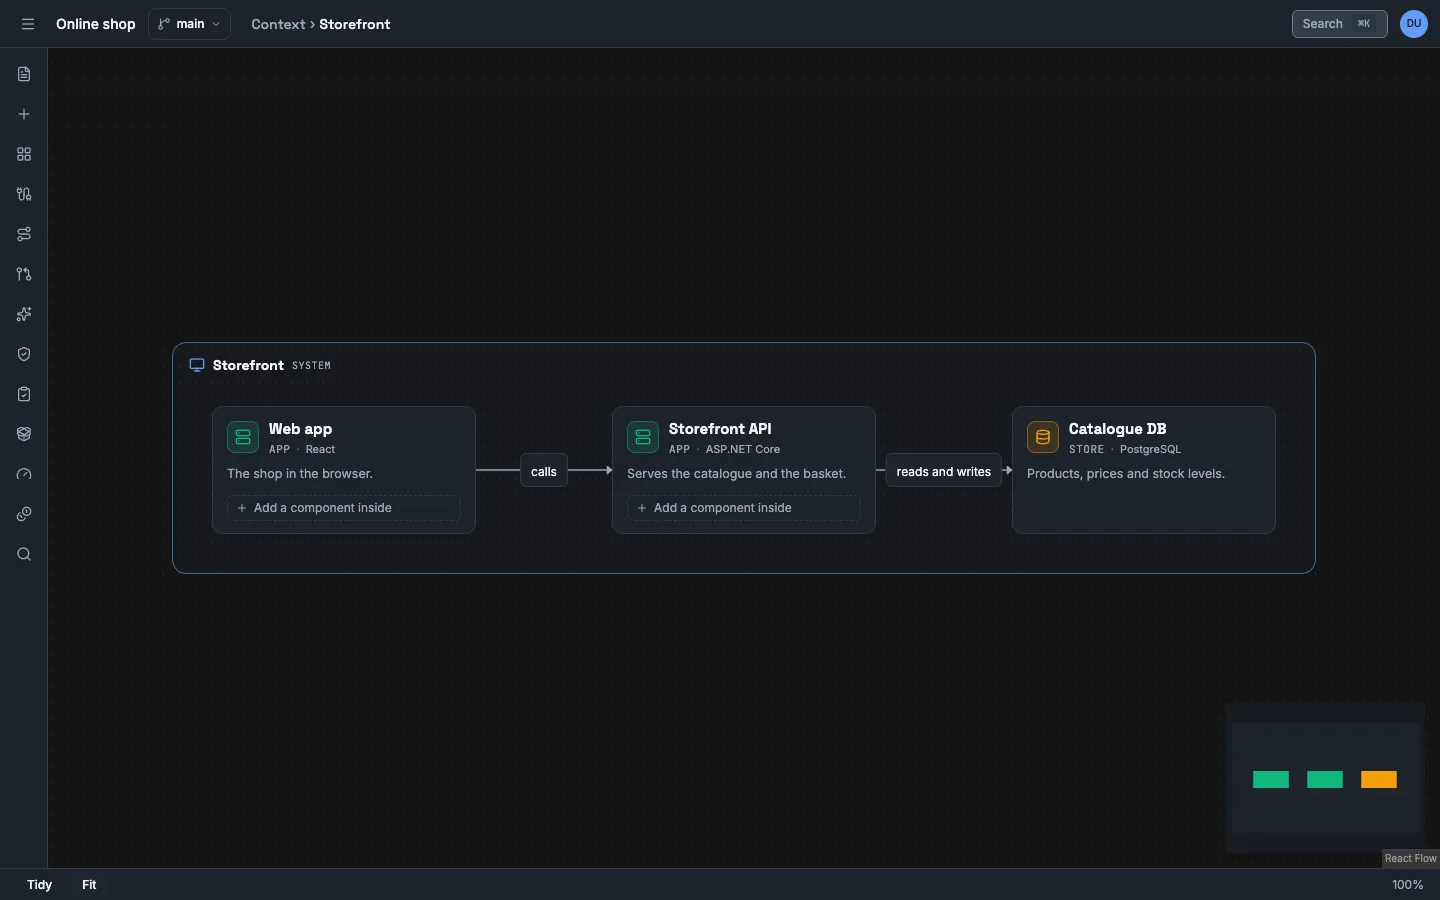
Expand in the same menu shows the children in place, inside a frame on the current level. Collapse hides them again. An element with no child has no Expand.
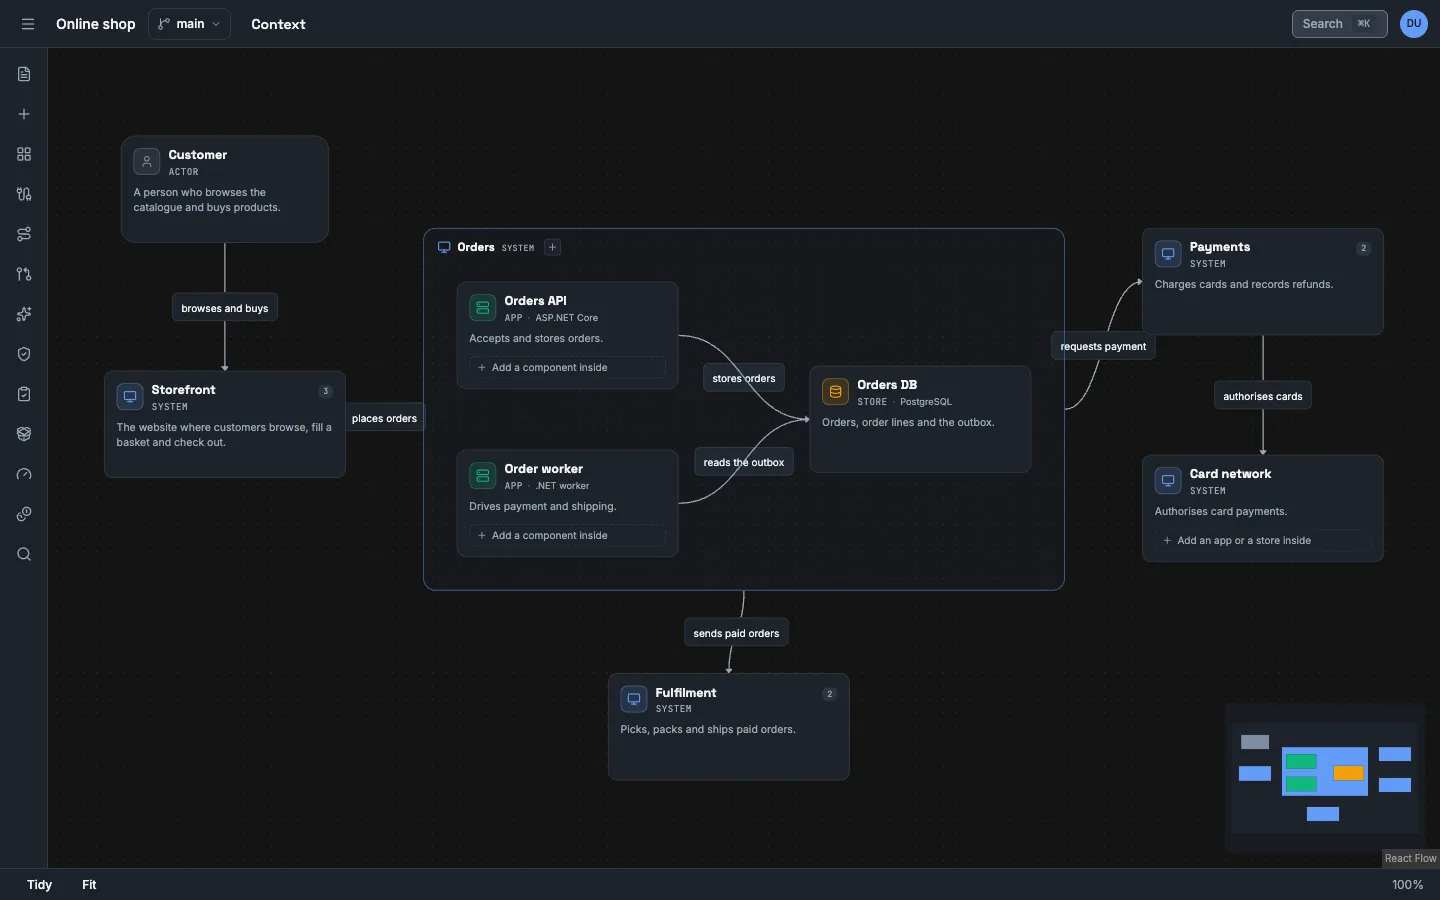
To add the first child of a system or an app, right-click it and select Add app inside, Add store inside or Add component inside. As an alternative, select it and use the buttons below Inside this system in the detail panel, or select Add an app or a store inside on its card.
The import from GitHub and the assistant also add children when you accept their proposals. See Import a repository and Design with the assistant.
Edit an element
Section titled “Edit an element”- Select the element. As an alternative, right-click it and select Edit details.
- In the detail panel, on the tab Details, change Name, Description, Technology, Status, Icon or Tags.
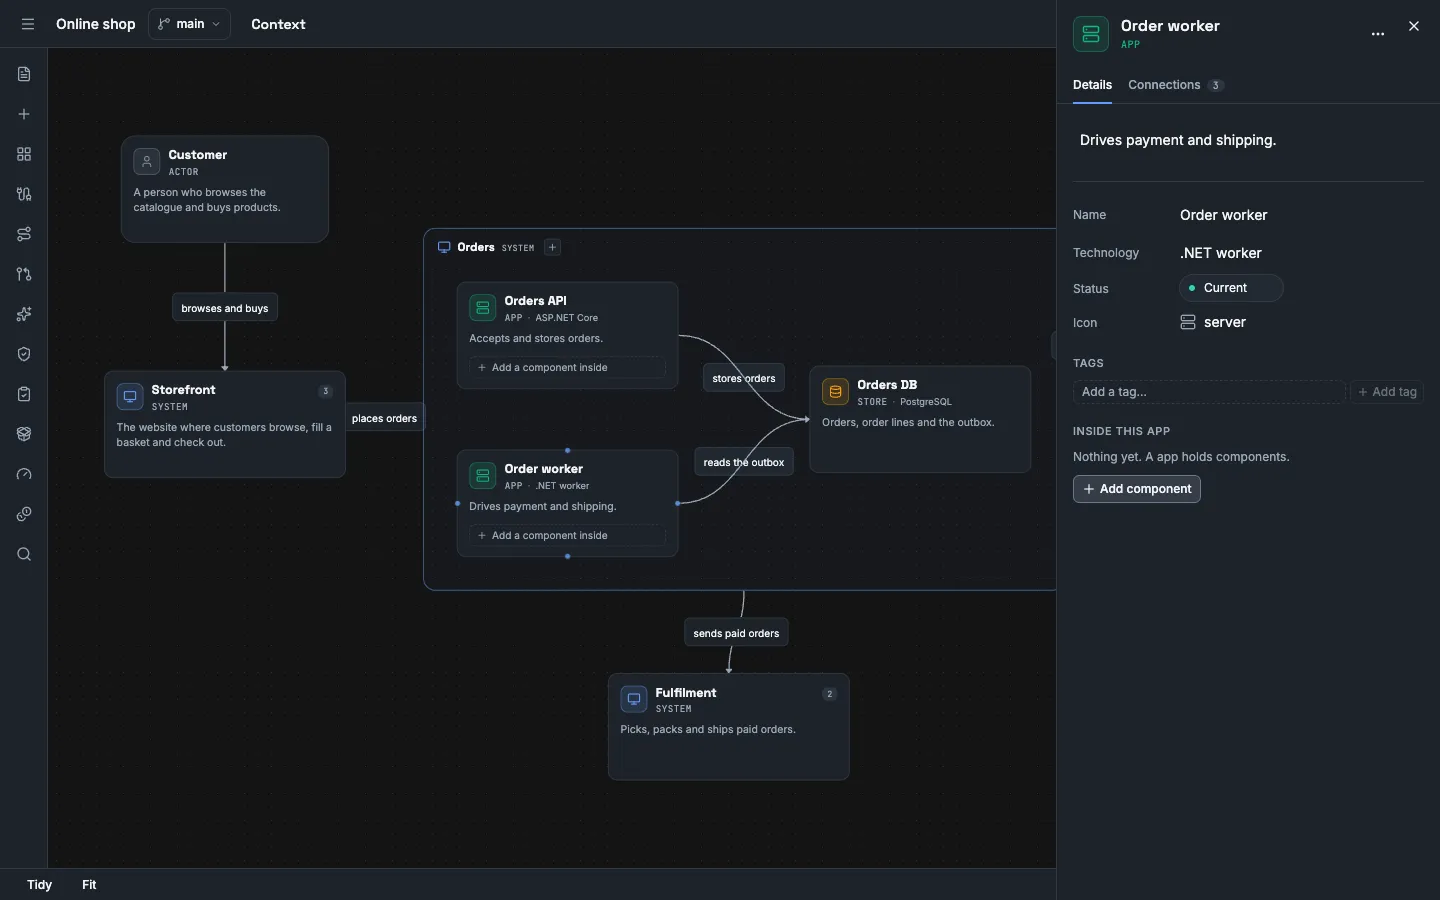
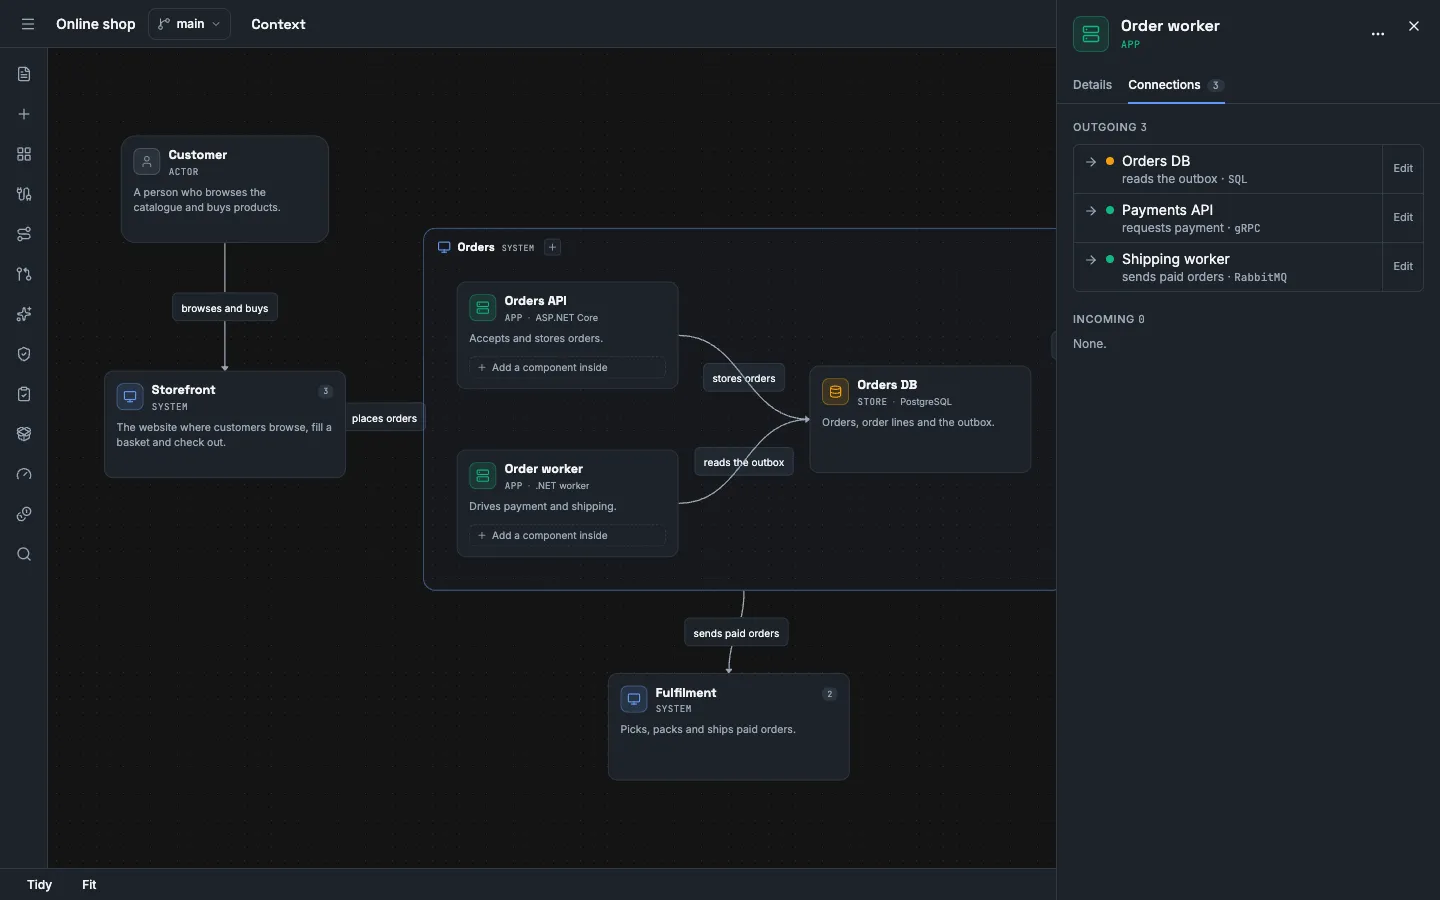
The tab Connections lists the relationships of the element, outgoing and incoming. Select a row to go to the other element. Select Edit on a row to open the relationship.
Status is Current, Planned or Deprecated.
To copy an element, right-click it and select Duplicate, or press Ctrl+D or Cmd+D.
To delete an element, select the ⋯ button in the header of the detail panel, then select Delete element. As an alternative, right-click the element and select Delete. Vellum refuses to delete an element when an operation, a channel, a message or a scenario names it or an element inside it. The answer is 409 and the message lists the references. Remove or reassign them first.
To change more than one element, select two or more elements. The toolbar at the top shows the count as selected. Set the Status, enter a tag in Add tag… and press Enter, or select Delete selected.
Ctrl+Z or Cmd+Z reverses the last canvas action. Add Shift to do it again.
Add a relationship
Section titled “Add a relationship”- Drag from a handle on the left or the right side of the source element to a handle at the top or the bottom of the target element.
- Select the relationship.
- In the Relationship panel, enter a Label and a Technology.
- Set the Kind to Structural or Behavioural. A structural relationship says that one part uses or depends on the other. A behavioural relationship says that one part calls or sends to the other at run time.
- Set the Line Style to Curved (Bezier), Straight or Right-angle (Step).
To delete it, select the ⋯ button in the header of the panel, then select Delete relationship. Confirm Delete this relationship?.
A relationship that you draw is Structural. In the API the kind is structural or behavioural.
The server refuses a relationship when an end does not exist. The messages are Source element not found and Target element not found.
Find an element
Section titled “Find an element”- Press
Ctrl+ForCmd+F. Enter text in Search name, kind, technology, truth label…. PressEnterto go to the next match. PressEscapeto close. - Press
Ctrl+KorCmd+K, or select Search in the left toolbar. Enter text in Search elements, actions… and select an element.
The command palette also has these actions: Add element, Toggle status lens, Toggle metadata lens, Toggle messages lens, Toggle truth labels, Tidy layout, Zoom to fit and Go to top level.
Arrange and save a diagram
Section titled “Arrange and save a diagram”A diagram is a saved view of the model. It has a name and a position for each element. Positions are layout. They are not part of the model and they carry no meaning.
- Drag the elements. Vellum saves each position in the diagram.
- To let Vellum arrange the diagram, press
T, or right-click the canvas and select Tidy layout. - To see the full diagram, right-click the canvas and select Zoom to fit.
- To add a diagram, select Create new in the left toolbar, select New Diagram, enter a Diagram name and select Create.
- To open a diagram, select Project files in the left toolbar and select the diagram.
Each diagram shows the same model. An element that you delete is gone from each diagram.
Rename or delete a diagram
Section titled “Rename or delete a diagram”- Select Project files in the left toolbar.
- Point to the diagram and select its ⋯ button.
- Select Rename, enter the new name and select Rename. Or select Delete….
Before a delete, the dialog lists each document that embeds the diagram with a <LiveView> tag. Select Delete diagram to delete it. The diagram and its layout go. The elements and the relationships stay in the model. The text of each document stays as it is, and its embed shows This diagram was deleted.
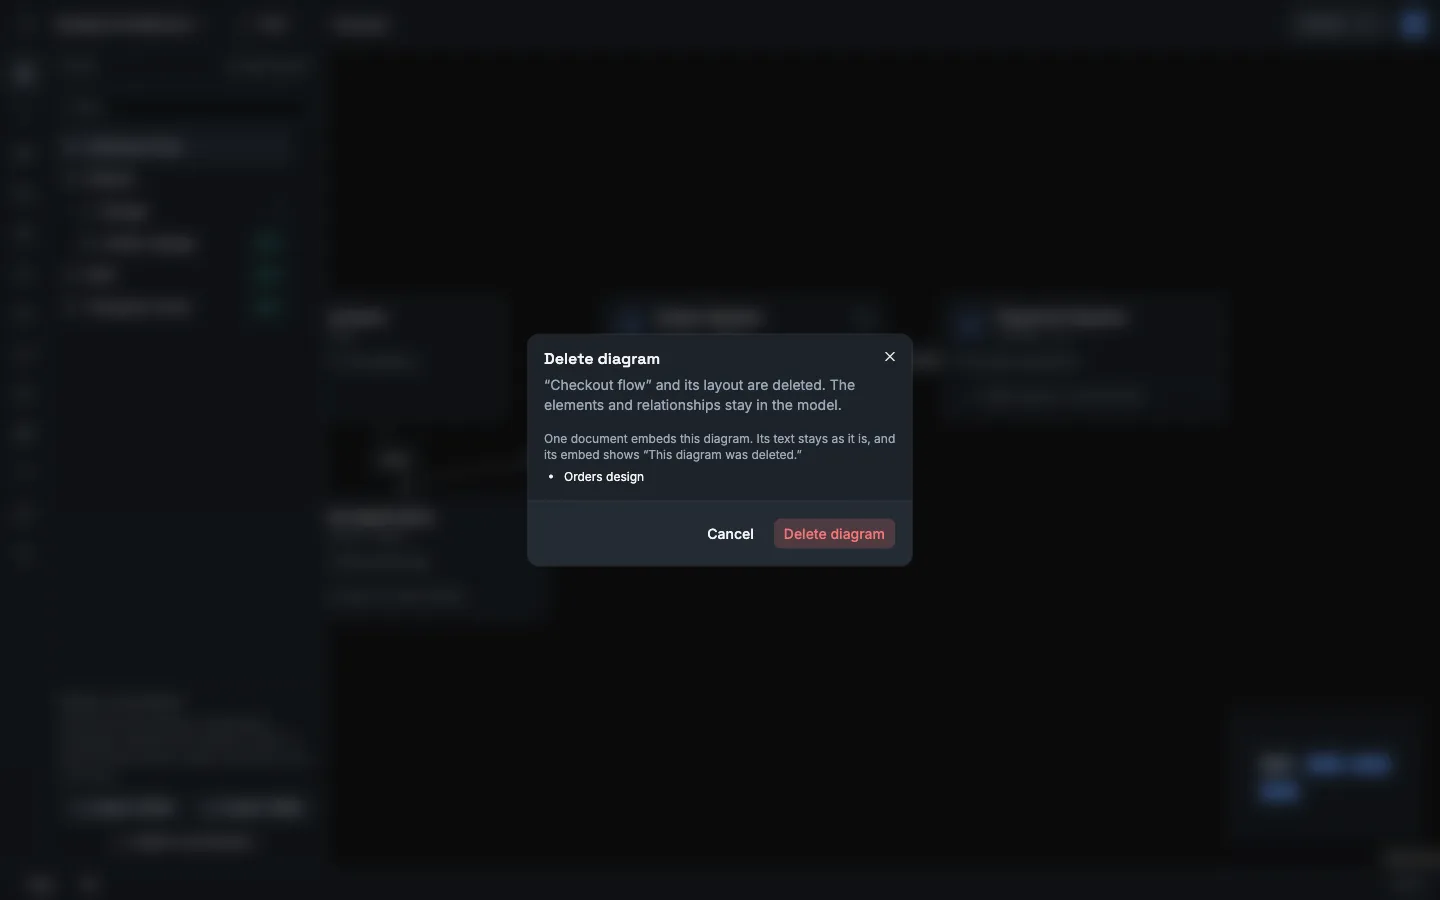
The API calls are PATCH /api/projects/{projectId}/views/{viewId} and DELETE /api/projects/{projectId}/views/{viewId}. GET /api/projects/{projectId}/docs?embedsViewId={viewId} lists the documents that embed a diagram.
Read the truth labels
Section titled “Read the truth labels”Each element and relationship has a truth label.
| Label | Value in the API |
|---|---|
| Declared | declared |
| Observed in source | observed-in-source |
| Inferred | inferred |
| Measured | measured |
| Unknown | unknown |
- Press
4, or select Toggle truth labels in the command palette. - Read the Truth labels panel. It counts the labels and the Structural and Behavioural relationships that are on the screen.
- Press
4again to close the panel.
An element that you draw is Declared. An element from an import has the label of its evidence. See Evidence and truth labels.
The detail panel of an element, a relationship or a message shows the label below Truth, with the source, the source revision, the confidence, and who accepted the fact, when and on which model version.
Change a truth label
Section titled “Change a truth label”A person changes a label in two ways only. No control sets Measured or Observed in source: those labels claim evidence, and only an import or a measured result gives evidence.
| Label now | Action | Label after |
|---|---|---|
| Inferred, Observed in source or Unknown | Accept as declared | Declared |
| Declared | Mark as unknown | Unknown |
| Measured | None | Measured |
- Select the element or the relationship. In the Details tab, find Truth.
- Select Accept as declared or Mark as unknown.
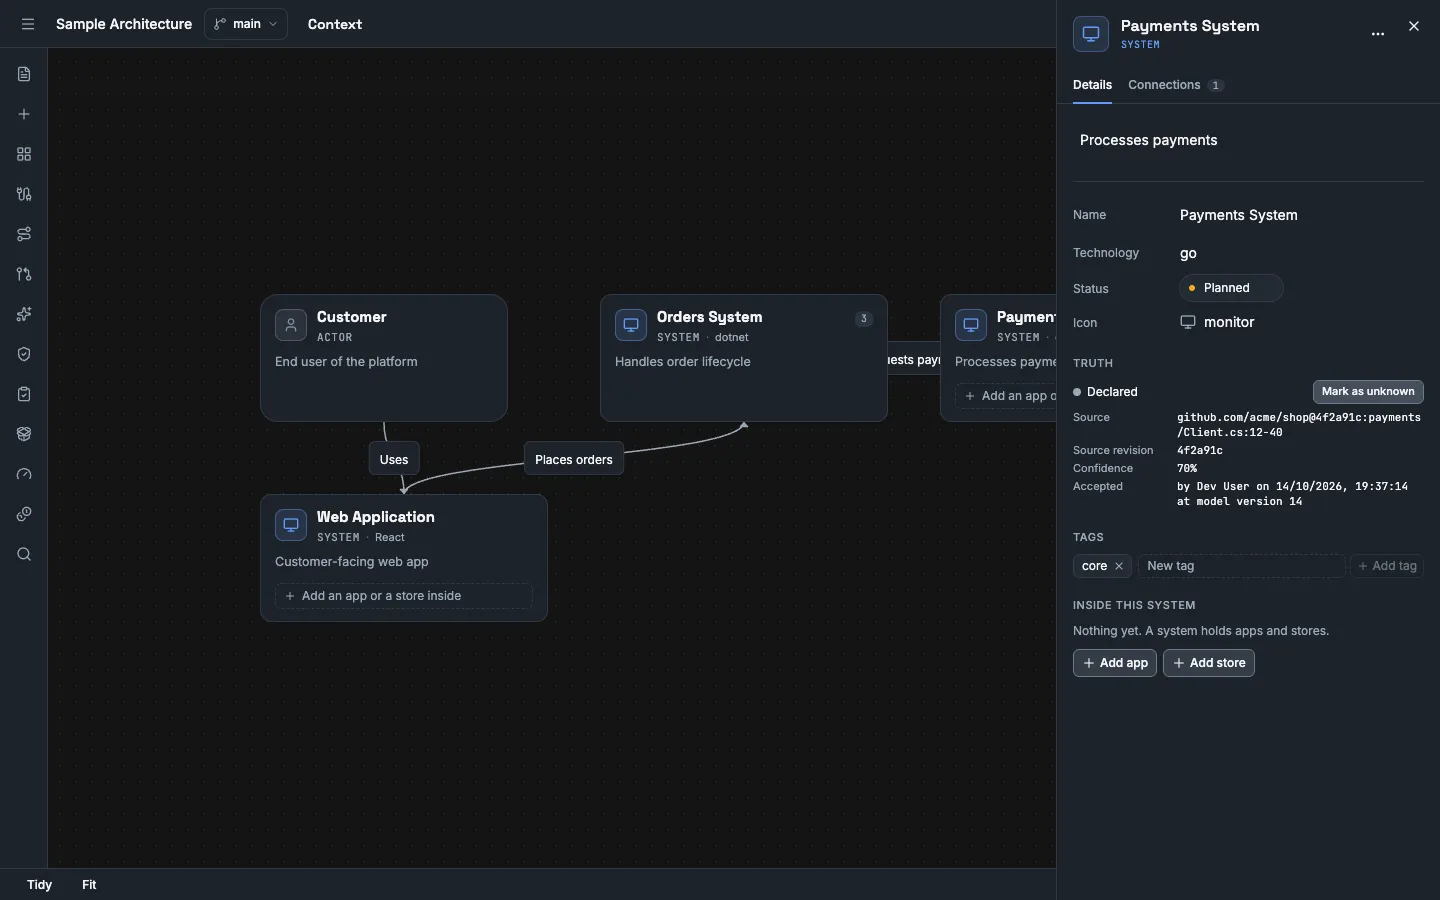
You can also right-click the element or the relationship on the canvas and select the action. For an operation, a channel, a subscription or a binding, use the action on its row in Contracts.
The fact keeps its source, its source revision and its confidence. Vellum records you as the person who accepted it, the time, and the model version and branch that you accepted it on. Truth shows this as, for example, by Dev User on 14/10/2026, 19:37:14 at model version 14. In the API the fields are acceptedBy, acceptedAt, acceptedAtVersion and acceptedOnBranch in provenance. You need the editor role. A named revision is read-only, so it has no action.
The API endpoints are POST /api/projects/{projectId}/facts/{entityType}/{entityId}/accept and POST /api/projects/{projectId}/facts/{entityType}/{entityId}/mark-unknown. entityType is element, relationship, message, operation, channel, subscription or binding. Add ?branchId=<stream-id> for a draft or a variant. The request has no body. An agent token gets 403. A fact with another label gets 409 and the reason.
The other lenses are 1 for status, 2 for metadata and 3 for messages.
Add JSON schemas and messages
Section titled “Add JSON schemas and messages”A message is data that one element produces and other elements consume. A message can name a JSON schema.
To add them in the app, select Contracts in the left toolbar, then select Add next to Schemas or Messages. Model your first system and trace a flow shows the message form. To add them with the API, follow these steps.
-
Create the schema. The
contentis the JSON Schema as a string.Terminal window curl -X POST "http://localhost:8080/api/projects/<project-id>/schemas" \-b vellum.cookies \-H "Content-Type: application/json" \-d '{"id":"<schema-uuid>","name":"OrderPlaced","description":null,"content":"{\"type\":\"object\",\"properties\":{\"orderId\":{\"type\":\"string\"}}}"}' -
Create the message. Name the element that produces it and the elements that consume it.
Terminal window curl -X POST "http://localhost:8080/api/projects/<project-id>/messages" \-b vellum.cookies \-H "Content-Type: application/json" \-d '{"id":"<message-uuid>","name":"OrderPlaced","description":null,"producerId":"<element-id>","consumerIds":["<element-id>"],"schemaId":"<schema-uuid>","tags":[]}' -
In the app, press
3to show the messages on the canvas. -
Select a message. The detail panel shows Description, Producer, Consumers, Schema and Tags.
The schema rules are these.
| Rule | Message in the 400 answer |
|---|---|
| The content is JSON. | Content is not valid JSON |
| The content is a JSON object. | JSON Schema must be a JSON object |
The object has type, properties or $schema. |
JSON Schema must have a 'type', 'properties', or '$schema' property |
| The content has at most 262144 characters. | A schema holds at most 262144 characters; this one has <n> |
A message with a producer that does not exist gets Producer element not found.
Change a schema with PATCH /api/projects/{projectId}/schemas/{schemaId} and a message with PATCH /api/projects/{projectId}/messages/{messageId}. Vellum refuses to delete a schema that the model still uses. The answer is 409.
The curl examples use the session cookie of a signed-in person in the file vellum.cookies. Use the HTTP API shows how to sign in. An agent token cannot make the write calls on this page: those endpoints are not open to agent tokens and answer 403.
Next steps
Section titled “Next steps”- Operations, channels, subscriptions and scenarios: Trace a scenario.
- Text documents for the project: Write project documents.
- Copies of the model: Save revisions and compare variants.