Model your first system and trace a flow
In this tutorial you model a shop that takes an order and tells two other systems about it. You then play the flow, make one consumer fail, and read what happens to the message.
You need no AI provider and no repository.
Before you start
Section titled “Before you start”- Complete Run Vellum on your machine. You are signed in as the owner of a workspace.
Create a project
Section titled “Create a project”- On the home screen, select your workspace.
- Select + New Project.
- In Project name, give
First system. Select Create.
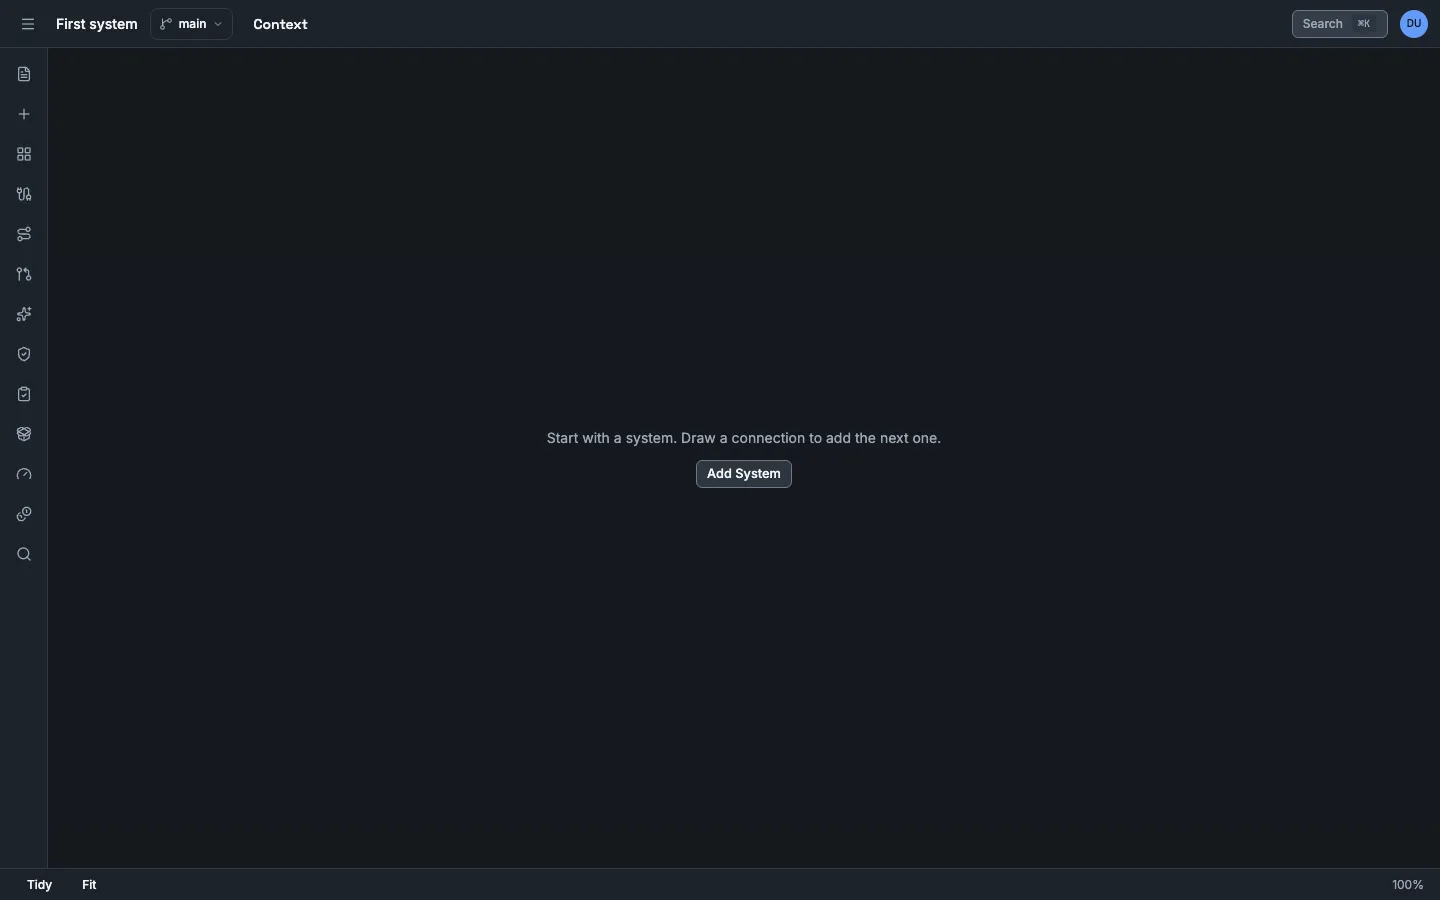
Vellum opens the project. The canvas is empty. It shows the text “Start with a system. Draw a connection to add the next one.” and the button Add System.
Add the elements
Section titled “Add the elements”-
Select Add System. The dialog Add Element opens.
-
In Name, give
Shop. Select Add.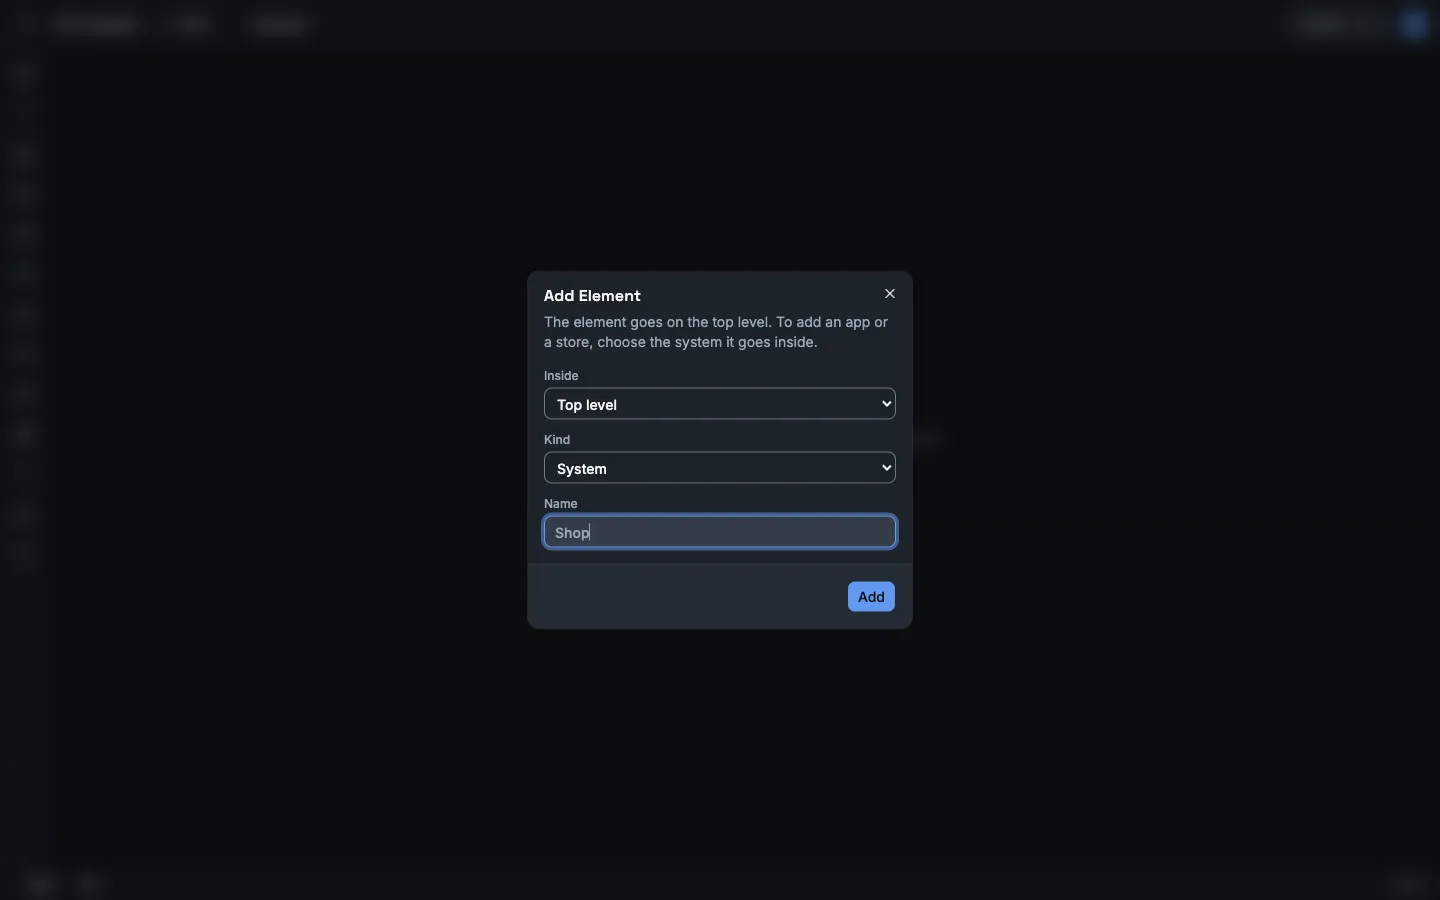
-
Press
N. The dialog opens again. -
Select the kind Actor. Give the name
Customer. Select Add. -
Press
N. Keep the kind System. Give the nameBilling. Select Add. -
Press
N. Keep the kind System. Give the nameWarehouse. Select Add. -
Select Tidy at the bottom of the screen. Vellum arranges the four elements.
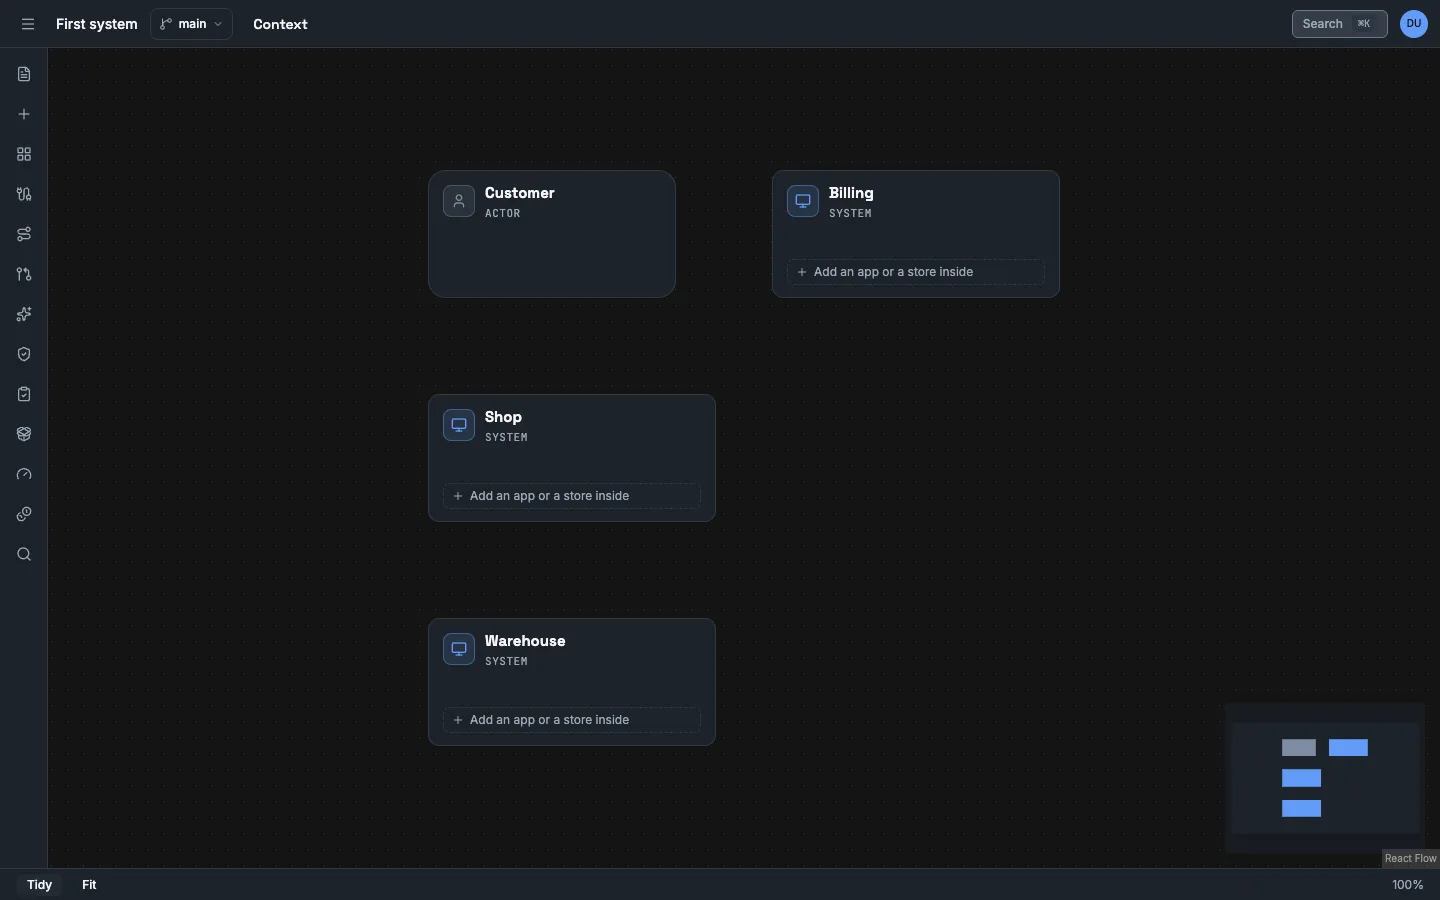
You now have one actor and three systems. Each has the label declared, because you state it.
The positions on the canvas are layout. They are not part of the model, and they change nothing in a trace.
Connect two elements
Section titled “Connect two elements”- Move the pointer over
Customer. A handle shows on each side. - Drag from the handle on the right side of
Customerto the handle at the top ofShop. A line starts at a handle on the left or the right side, and ends at a handle at the top or the bottom. - Select the new line. In the Relationship panel, give the Label
places orders.
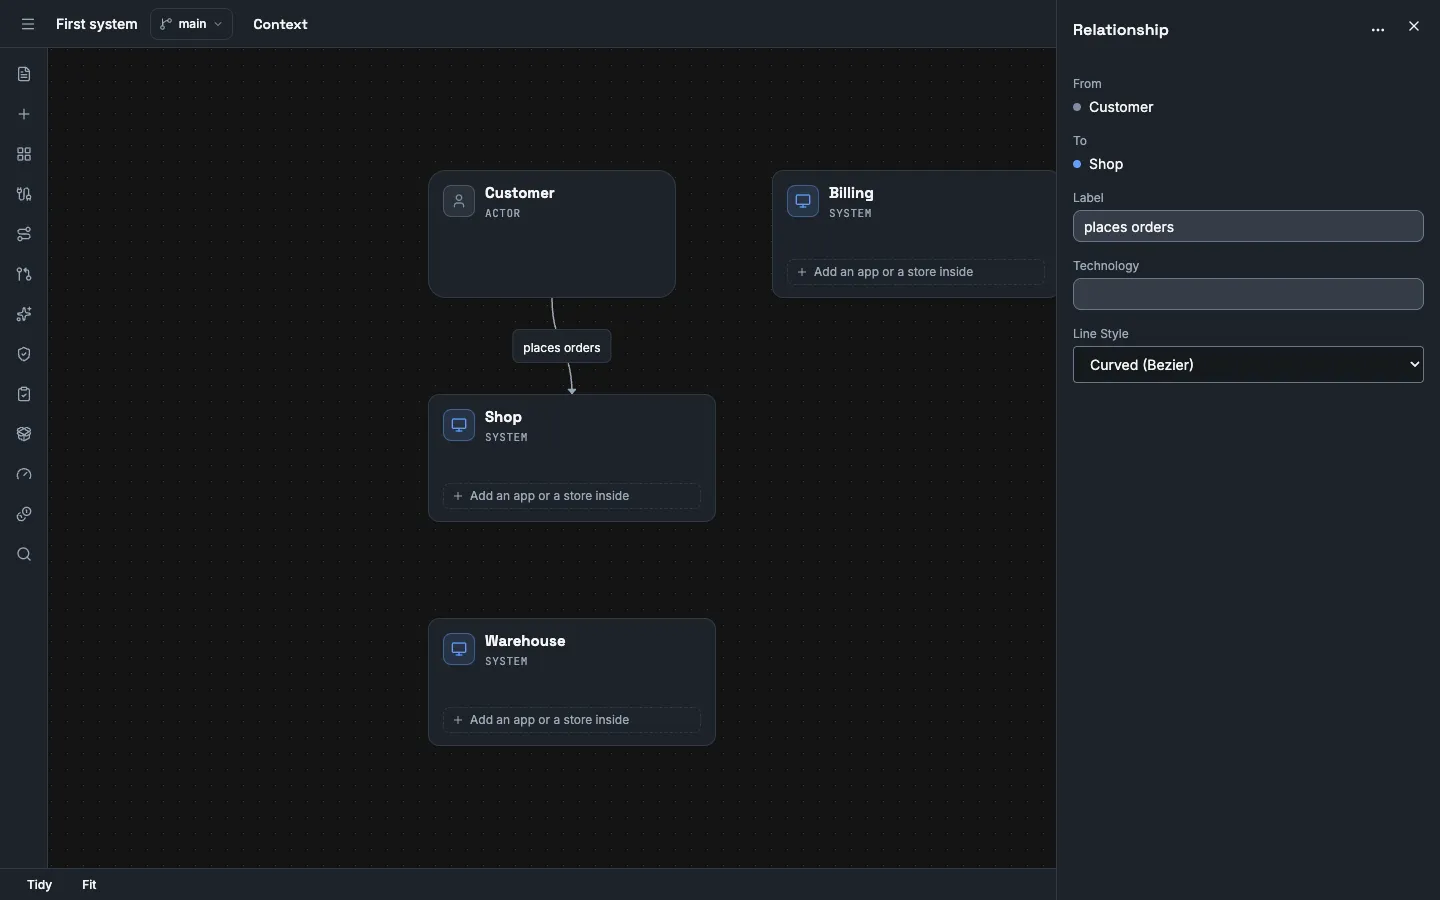
A relationship states structure: the customer uses the shop. It does not state behaviour. The line alone plays nothing. The contracts and the scenario of the next sections state the behaviour.
Look inside a system
Section titled “Look inside a system”A system holds apps and stores. You add them at the level of the system.
- Double-click
Shop. The breadcrumb at the top shows Context › Shop, and the detail panel ofShopopens. Select the close button of the panel. - Select Add Element. The dialog shows
Shop (system)in Inside and the kind App. Give the nameOrders API. Select Add. - Press
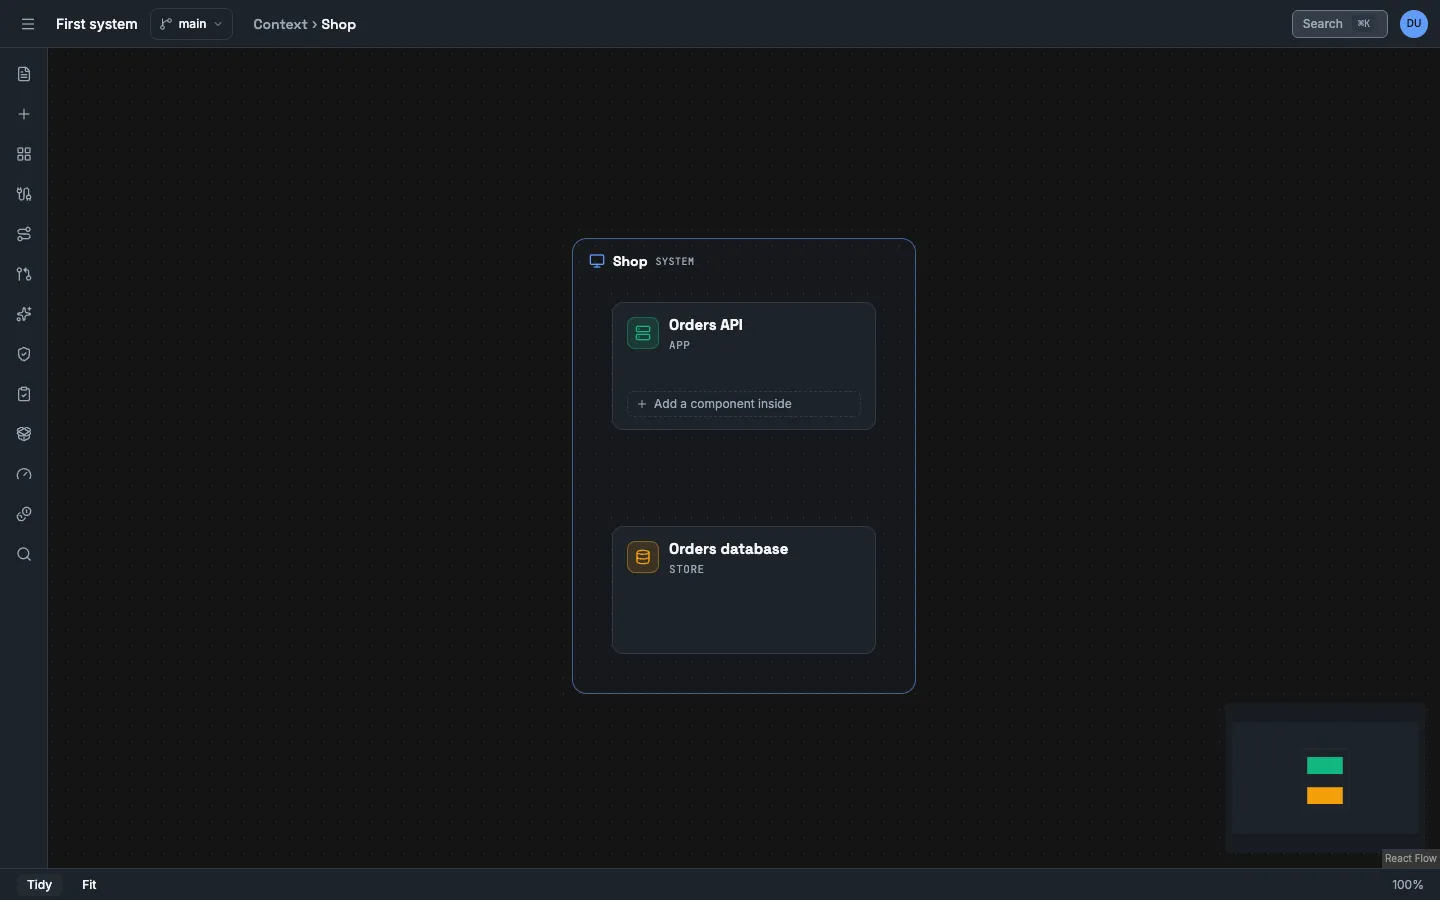
N. Select the kind Store. Give the nameOrders database. Select Add. - Select Tidy. A frame with the name
Shopholds the app and the store.
- Select Context in the breadcrumb to go back to the top level. The card of
Shopshows the number 2: it holds two elements.
The rest of this tutorial uses Shop, not the app or the store inside it.
Declare the contracts
Section titled “Declare the contracts”-
Select Contracts in the left toolbar.
-
Next to Operations, select Add. Give these values and select Add operation.
Field Value Name POST /ordersOffered by ShopTransport HTTP Timeout (ms) 1000Attempts 1Backoff (ms) 0 -
Next to Channels, select Add. Give the Name
order-eventsand the Kind Topic. Select Add channel. -
Select Add again. Give the Name
order-events.dlqand the Kind Queue. Select Add channel. -
Next to Subscriptions, select Add. Give these values and select Add subscription.
Field Value Channel order-eventsConsumer BillingAttempts 2Backoff (ms) 100Dead-letter channel order-events.dlq -
Select Add again. Give the Channel
order-eventsand the ConsumerWarehouse. Keep Attempts at1. Keep Dead-letter channel at None: a failed message is lost. Select Add subscription.
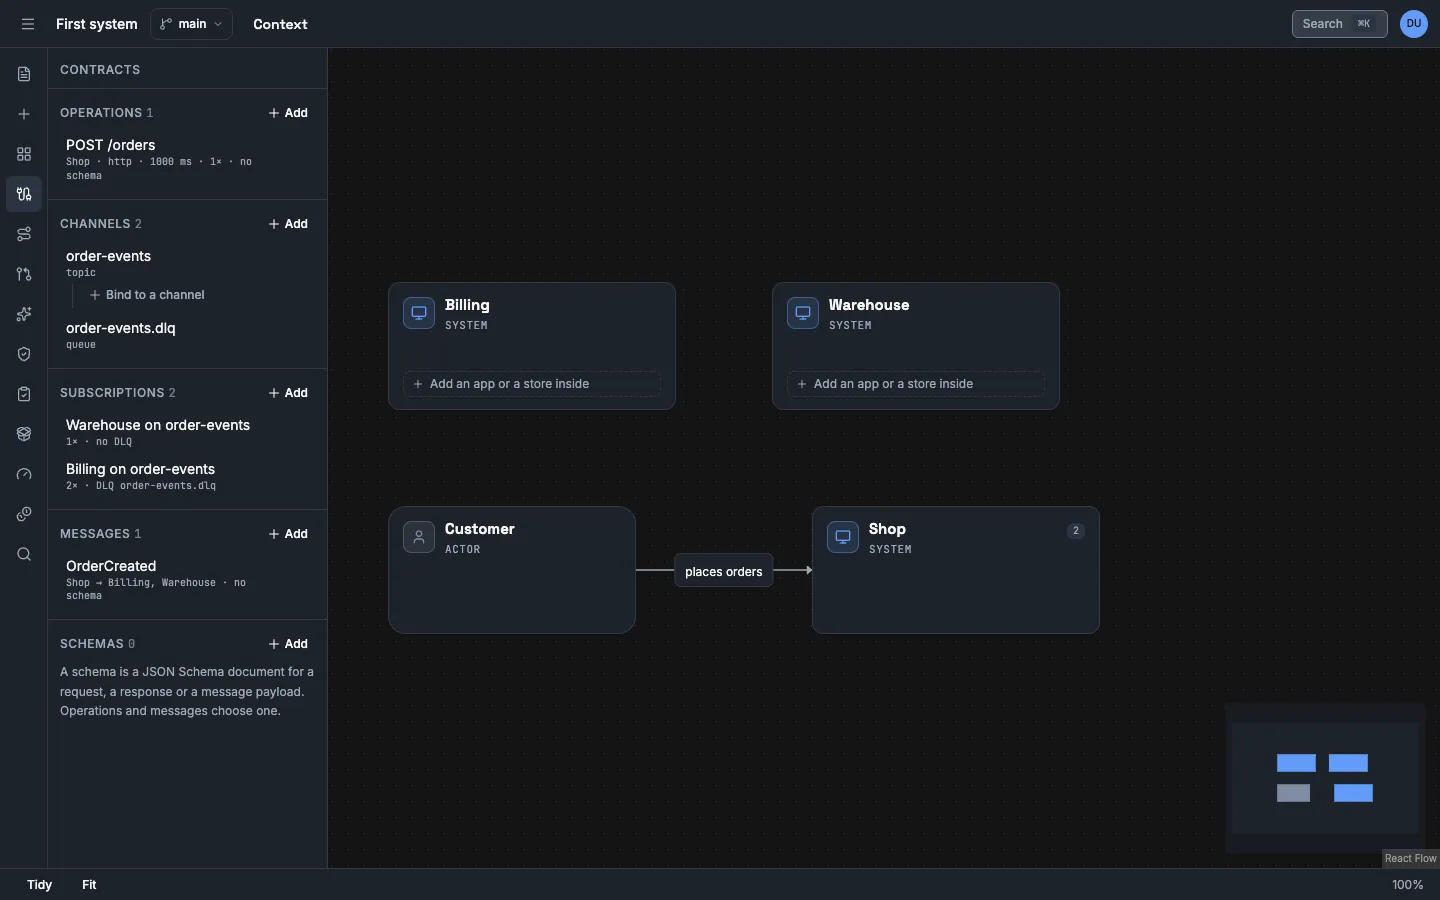
The flyout now lists one operation, two channels and two subscriptions: Billing on order-events and Warehouse on order-events.
Add the message
Section titled “Add the message”A publish step names a message.
-
In Contracts, next to Messages, select Add.
-
Give these values and select Add message.
Field Value Name OrderCreatedProducer ShopSchema None Consumers BillingandWarehouse
The flyout lists the message as Shop → Billing, Warehouse · no schema. The message has the label declared.
Write the scenario
Section titled “Write the scenario”A scenario is the steps of one behaviour, in order. You build it in the scenario editor. You select each element and each contract by its name.
- Select Scenarios in the left toolbar, then New.
- In Name, give
Place an order. - Below Steps, select Call. The editor adds a call step with the mark Trigger.
- In Caller, select
Customer. In Operation, selectPOST /orders. The editor shows that Shop serves the operation, with its timeout of 1000 ms. - In Request, give
{"sku": "apple", "qty": 2}. In Response, give{"orderId": "o-1"}. - At the top right of the step, change the step ID
call-1toplace. Press Enter. - Below the call step, in the last Add row, select Publish. The Add rows inside the call add steps inside the call.
- In Message, select
OrderCreated. The editor sets Publisher toShop, the producer of the message. - In Channel, select
order-events. Consumers now lists Billing on order-events and Warehouse on order-events. Each subscription receives the message. You do not add steps for them in this tutorial. - In Payload, give
{"orderId": "o-1"}. Change the step ID toannounce. Press Enter. - Below Expected results, select Step outcome. In Step, select
place. Keep Ends at Succeeded. - Select Event count. In Exactly, give
2. In Events, select deliveries (Delivered). Keep For at Any part. - Select Save and play.
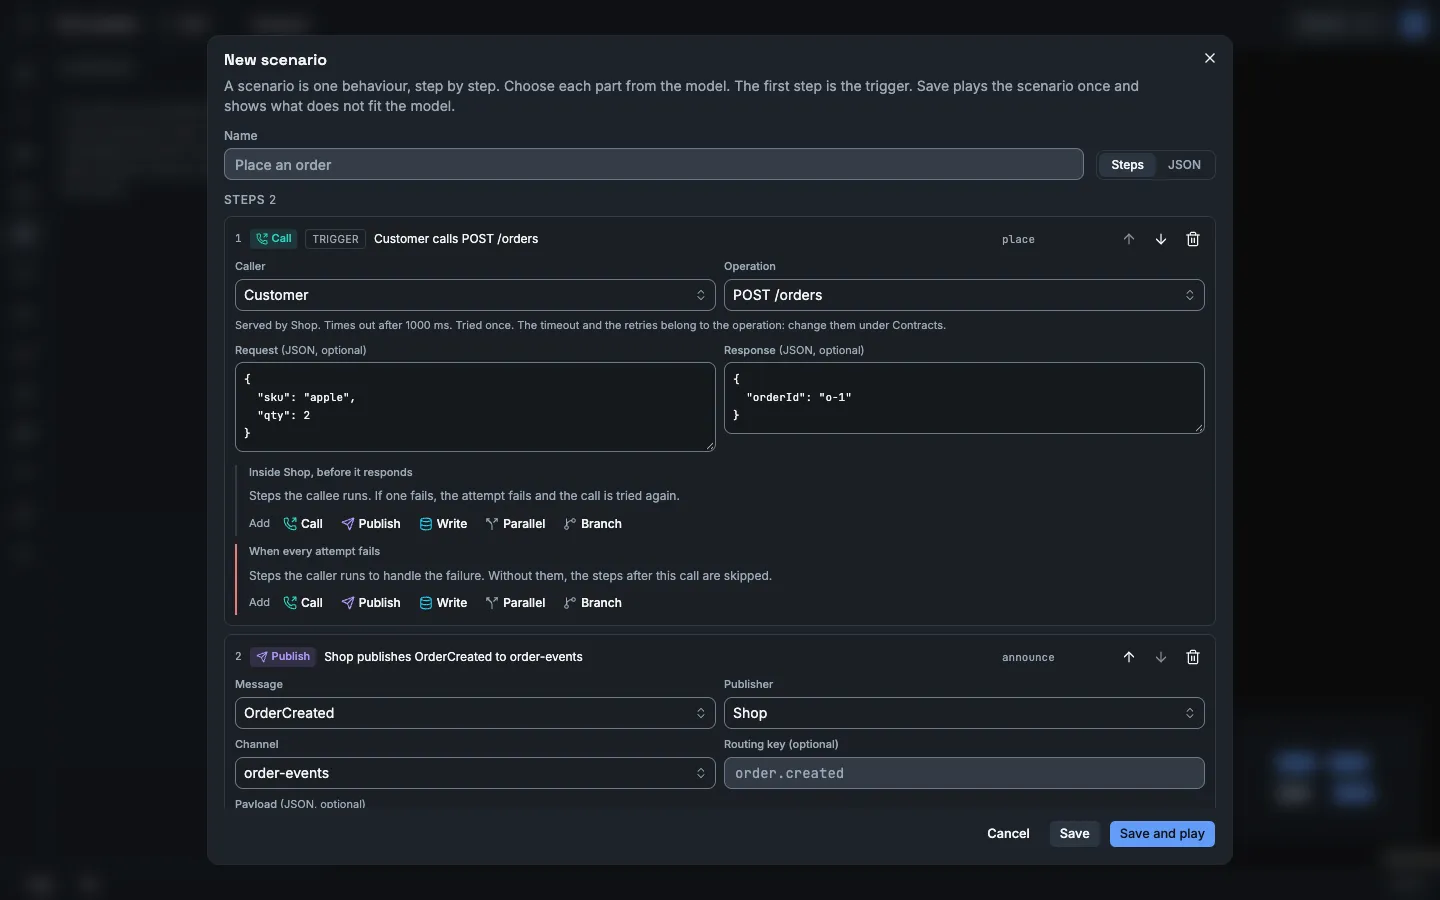
The scenario has two steps. place is a call from the customer to POST /orders. announce publishes OrderCreated to order-events. The two expected results state what you expect: the call succeeds, and the trace has two deliveries. The editor gives them the IDs expect-1 and expect-2.
Select JSON in the editor to see the same scenario as the server stores it. The steps refer to each part by its ID.
Play the flow
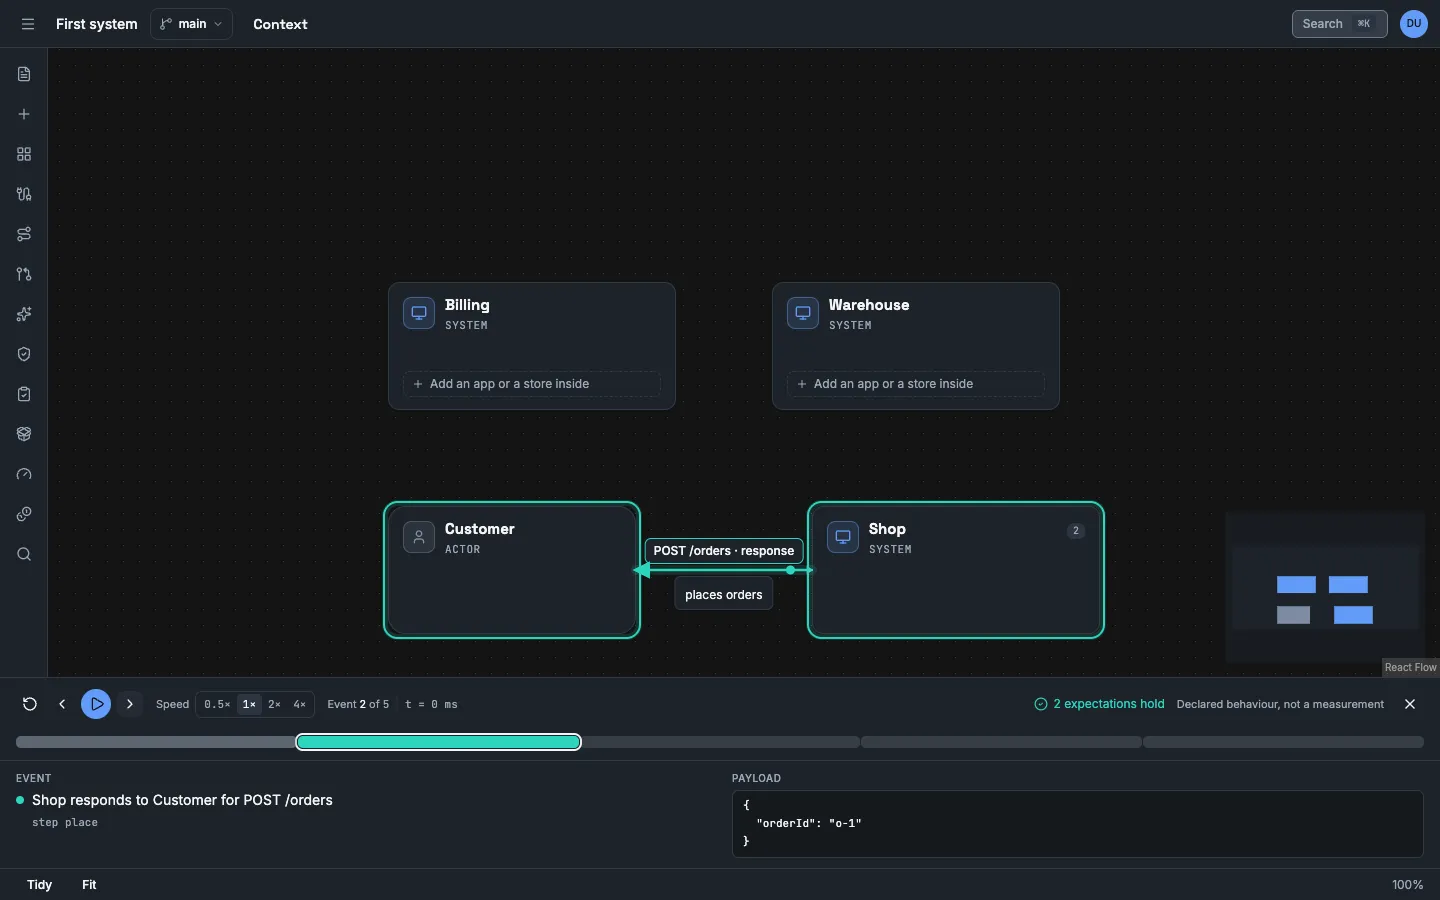
Section titled “Play the flow”The dock at the bottom of the canvas opens. It always shows the line “Declared behaviour, not a measurement”.
-
Select Play. Vellum moves through five events. The canvas shows a ring on the elements that take part in each event.
Event Text in the dock 1 Customer calls POST /orders on Shop 2 Shop responds to Customer for POST /orders 3 Shop publishes OrderCreated to order-events 4 Warehouse receives OrderCreated 5 Billing receives OrderCreated -
Select Restart, then select Next event two times. The dock shows event 2 and its payload: the response with
orderId. -
Read the right side of the dock: 2 expectations hold.
-
Select Close trace.
Vellum did not call a system. It played what you declared: one operation, one channel, two subscriptions and two steps. The same model and the same scenario always give the same events.
Make a consumer fail
Section titled “Make a consumer fail”Now ask a question: what happens to the message when Billing cannot handle it?
-
Select Scenarios. Select the edit button on the row Place an order.
-
Below Failures to inject, select Add a failure. In Target, select Billing on order-events. Keep Kind at Error. In Fails, select every attempt.
-
Select Save and play.
-
Select Play. The trace now has ten events. The first five are the same. Then:
Event Text in the dock 6 Billing fails to handle the message 7 Retry 2 of Billing on order-events is scheduled 8 Billing receives OrderCreated (attempt 2) 9 Billing fails to handle the message (attempt 2) 10 OrderCreated for Billing moves to order-events.dlq -
Read the right side of the dock: 1 of 2 expectations fail. Select that text. The failed expectation is
expect-2, with the reason “3 Delivered event(s); expected 2.”
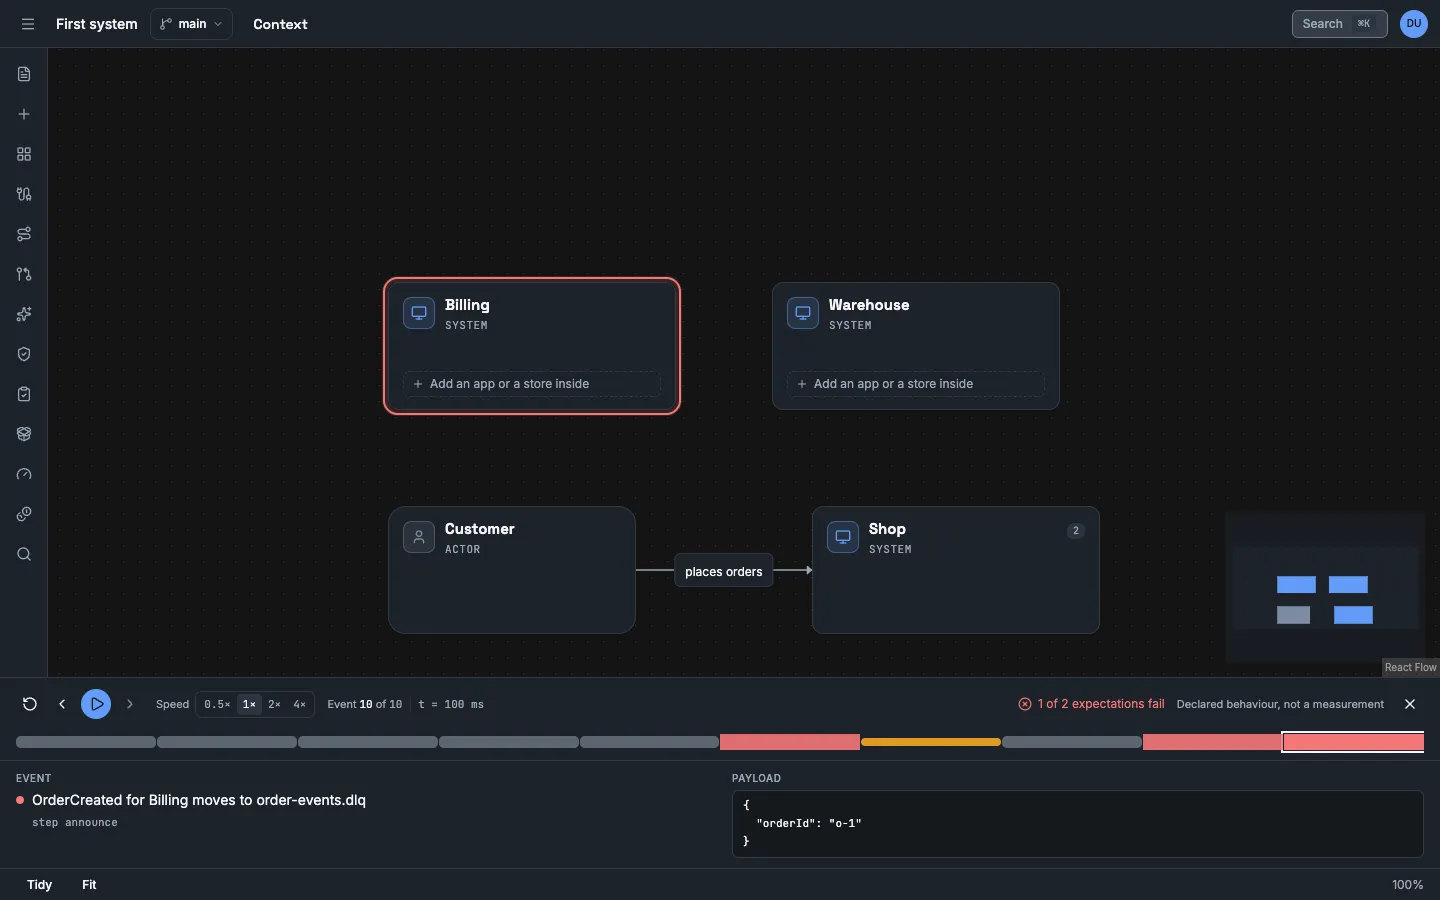
Read what the trace tells you:
- The subscription of Billing has two attempts and a backoff of 100 ms. The trace shows the second attempt. Time in a trace is virtual: only a timeout and a backoff move it.
- After the last attempt, the message moves to the dead-letter channel that you selected. It is not lost.
- The warehouse got the message one time and is not affected. A publisher does not wait for its consumers.
- The expectation counted deliveries, and a retry is a second delivery. An expectation that holds without a fault can fail with one. Decide what you want to state, and state it exactly.
To see a lost message, move the fault to the subscription of the warehouse, which has no dead-letter channel. The trace then has the event “OrderCreated for Warehouse is lost”. No later event delivers that message.
What you did
Section titled “What you did”- You modelled six elements and one relationship, and each has the label
declared. - You declared one operation, two channels, two subscriptions and one message.
- You played a flow that the contracts permit, and you saw each payload.
- You injected a failure and read the retry and the dead-letter path.
Limits that you met
Section titled “Limits that you met”- A trace shows the declared design. It does not show that your code does the same. See A trace is declared behaviour.